When Your Neighbors Are Too Close and Your Walls Are Too Thin
You bought a home in Victoria. Maybe it’s a charming character house in Fernwood. Maybe it’s a townhome in Langford. Maybe it’s a condo in James Bay.
And then you discovered the walls are paper-thin.
You hear your neighbor’s TV through the bedroom wall. Their footsteps on the floor above you. Their conversations in the kitchen. Their alarm clock at 6 AM.
Or maybe it’s the other way around—you’ve got kids, you work from home, you play music, and you’re constantly worried about disturbing the people next door.
Here’s the truth: most residential construction in BC prioritizes cost over sound control. Builders meet minimum code requirements, which means your walls can legally transmit way more noise than anyone wants to live with.
If you’re tired of hearing every word your neighbors say—or tired of tiptoeing around your own home—soundproofing your walls and ceilings is the permanent solution.
And if you’re in Victoria, Oak Bay, Saanich, Esquimalt, or anywhere in the Greater Victoria area, Finest Finish can help.
The Real Cost of Living With Noise (And Why Most People Wait Too Long to Fix It)
Let’s be honest about what constant noise does to you:
Sleep disruption. You can’t fall asleep because of bass thumping through the wall. You wake up to footsteps overhead. You’re exhausted, irritable, and running on fumes.
Work-from-home nightmare. You’re on a Zoom call and your neighbor’s dog starts barking. Your kid’s online class gets interrupted by the unit next door blasting music. Your productivity tanks.
Strained relationships. You avoid having friends over because the walls are too thin. You fight with your partner about the noise. You leave passive-aggressive notes for your neighbors instead of just living your life.
Property value hit. Thin walls are a dealbreaker for buyers. When someone tours your home and hears the neighbor’s conversation word-for-word, they’re not making an offer.
Most people try the cheap fixes first:
- Foam panels that do almost nothing
- White noise machines that just add more noise
- Rugs and curtains that barely make a dent
- Politely asking neighbors to keep it down (which works for about three days)
None of it solves the problem. Because the problem isn’t the noise source—it’s the walls.
How Sound Actually Travels Through Walls (And Why Standard Drywall Doesn’t Stop It)
Here’s what most people don’t understand:
Sound is vibration. When someone talks, plays music, or walks across the floor, it creates vibrations that travel through the air, hit the wall, and transfer directly through the drywall into your space.
Standard residential walls in Victoria are built like this:
- Single layer of 1/2″ drywall on each side
- Wood studs connecting both sides (creating a direct vibration path)
- Minimal or no insulation in the cavity
This design does almost nothing to stop sound. The vibrations move straight through the studs. The drywall is too light to block low-frequency noise. And there’s nothing in the wall cavity to absorb sound energy.
That’s why you can hear conversations, TV dialogue, footsteps, and bass through the walls—even though they look solid.
Effective soundproofing requires three things:
- Mass — heavier materials block more sound
- Decoupling — breaking the direct vibration path between surfaces
- Absorption — materials that convert sound energy into heat instead of letting it pass through
When you combine all three, you can reduce sound transmission by 50-80%, depending on the construction and materials used.
The Finest Finish Soundproofing Process (How We Actually Stop the Noise)
Most contractors throw up an extra layer of drywall and call it “soundproofing.” It barely helps.
Here’s how we do it right:
Step 1: Assessment & Noise Source Identification
We identify where the noise is coming from, what type of noise it is (airborne vs. impact), and which walls or ceilings need treatment. Not every wall needs soundproofing—targeting the right ones saves you money.
Step 2: Decoupling the Structure
We install resilient channels or staggered studs to break the direct connection between the wall surfaces. This prevents vibrations from traveling straight through the studs.
Resilient channels are metal or spring-loaded strips mounted perpendicular to the studs. The new drywall attaches to the channels, not the studs, creating a mechanical break in the vibration path.
For maximum sound isolation (common walls between units, recording studios, home theaters), we use double-stud walls—two separate stud frames with no physical connection between them.
Step 3: Adding Mass
We add mass-loaded vinyl (MLV) or additional layers of drywall to increase the wall’s density. Heavier walls block more sound, especially low-frequency noise like bass, traffic, and footsteps.
MLV is a thin, heavy, flexible material (think dense rubber) that dramatically increases sound blocking without adding much thickness to the wall.
For ceiling soundproofing (stopping noise from the unit above), we often use two layers of 5/8″ Type X drywall instead of standard 1/2″ drywall. The extra mass makes a measurable difference.
Step 4: Sound Absorption in the Cavity
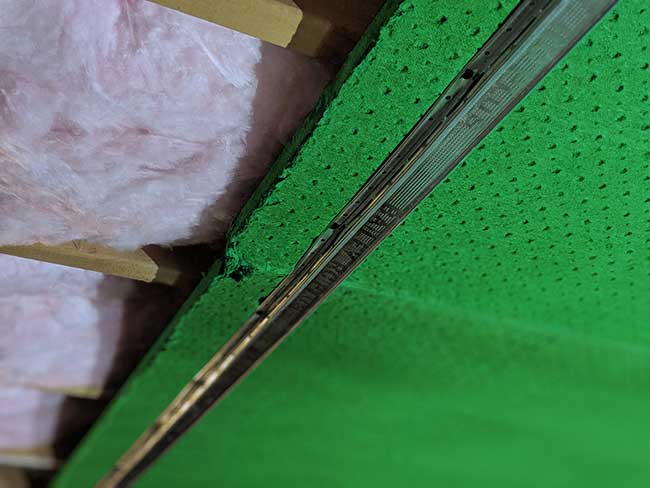
We fill the wall cavity with acoustic insulation—either mineral wool (Roxul Safe’n’Sound) or dense fiberglass. This absorbs sound energy inside the wall so it doesn’t bounce back and forth between surfaces.
Standard pink fiberglass insulation (the stuff in most walls) is designed for thermal insulation, not sound. Acoustic insulation is denser and specifically engineered to absorb sound frequencies.
Step 5: Damping with Green Glue
Between drywall layers, we apply Green Glue Noiseproofing Compound—a viscoelastic damping material that converts sound vibrations into heat.
It’s applied in a grid pattern between two sheets of drywall. When sound hits the wall, the Green Glue layer flexes and dissipates the energy instead of transmitting it.
This is one of the most cost-effective soundproofing upgrades available. It’s not expensive, it’s easy to apply, and it works.
Step 6: Sealing Air Gaps
Sound travels through air. Even the smallest gaps around electrical outlets, light switches, baseboards, and ceiling fixtures can leak noise.
We seal every penetration with acoustic sealant (not regular caulk—it stays flexible and doesn’t crack over time). We use putty pads around electrical boxes. We ensure the wall assembly is airtight.
Step 7: Finishing & Paint
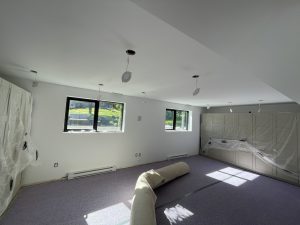
Once the soundproofing layers are installed, we finish the drywall to a smooth, paint-ready surface. You’ll never know there’s a soundproofing system behind it—it just looks like a normal wall.
What Soundproofing Actually Costs in Victoria (And What You Get for Your Money)
Soundproofing costs vary based on:
- Wall or ceiling square footage
- Construction method (resilient channels vs. double studs vs. room-within-room)
- Materials used (MLV, Green Glue, acoustic insulation type)
- Existing wall condition (drywall removal required or installing over existing)
- Electrical/HVAC work (relocating outlets, vents, light fixtures)
Typical pricing for soundproofing in Victoria:
Basic Soundproofing (one shared wall in a condo or townhome):
- Resilient channels + one layer 5/8″ drywall + acoustic insulation + Green Glue
- $15 – $25 per square foot
- Example: 10′ x 8′ wall = 80 sq ft = $1,200 – $2,000
Standard Soundproofing (bedroom or home office):
- Resilient channels + two layers drywall + MLV + acoustic insulation + Green Glue + sealed outlets
- $25 – $40 per square foot
- Example: 12′ x 10′ wall = 120 sq ft = $3,000 – $4,800
Premium Soundproofing (recording studio, home theater, or maximum noise reduction):
- Double-stud wall or room-within-room construction + MLV + multiple drywall layers + isolation clips + acoustic insulation
- $40 – $70 per square foot
- Example: 12′ x 10′ wall = 120 sq ft = $4,800 – $8,400
Ceiling Soundproofing (reducing footstep noise from above):
- Resilient channels + two layers 5/8″ Type X drywall + acoustic insulation + Green Glue
- $20 – $35 per square foot
- Example: 12′ x 12′ ceiling = 144 sq ft = $2,880 – $5,040
Add 20-30% if existing drywall needs to be removed first.
Here’s what you’re actually paying for:
Not just materials and labor—you’re paying for peace, privacy, better sleep, work-from-home functionality, and property value.
A $3,000 investment in soundproofing a shared bedroom wall is worth it if it means you can actually sleep through the night and stop planning your life around your neighbor’s schedule.
The Finest Finish Lifetime Warranty (Because Soundproofing Should Last as Long as You Own the Home)
Industry standard warranty for drywall work in BC? Two years.
Finest Finish guarantees soundproofing installations for life.
If the drywall cracks, separates, or fails due to our workmanship—we come back and fix it at no cost to you. Not two years. Not ten years. Life.
Why can we offer this when other contractors won’t?
Because we use the right materials, the right techniques, and the right preparation. We’re not cutting corners to hit a price point. We’re building sound barriers that last.
When you hire Finest Finish for soundproofing, you’re buying certainty. The work will hold up. The noise will stay out. And you won’t be paying to fix it again in five years.
Common Soundproofing Questions Victoria Homeowners Ask
Will soundproofing completely eliminate all noise?
No. Soundproofing reduces noise transmission—typically by 50-80% depending on construction and materials. You’ll still hear very loud noises (slamming doors, heavy impacts), but normal conversation, TV, music, and footsteps will be dramatically quieter.
Complete silence requires extreme measures (recording studio-level construction) that most residential projects don’t need.
Can you soundproof just one wall, or do I need to do the whole room?
You can soundproof individual walls. Most people start with the shared wall where noise is worst. However, sound can flank around through ceilings, floors, and adjacent walls, so treating multiple surfaces is more effective.
We’ll assess your situation and recommend the most cost-effective approach.
What’s the difference between soundproofing walls vs. ceilings?
Walls typically deal with airborne sound (voices, TV, music). Ceilings deal with impact sound (footsteps, moving furniture, dropped objects).
Ceiling soundproofing requires more mass and often benefits from isolation clips or resilient channels to prevent impact vibrations from transferring directly through the structure.
How much thickness does soundproofing add to the wall?
Depends on the method:
- Resilient channels + one layer drywall: ~1.5 inches
- Resilient channels + two layers drywall + MLV: ~2 inches
- Double-stud wall construction: 6-8 inches total wall thickness
For most condos and townhomes where space is tight, resilient channels + Green Glue + acoustic insulation is the best balance of performance and thickness.
Do I need to remove the existing drywall first?
Not always. If the existing wall is in good condition, we can often install resilient channels and new drywall over it, adding soundproofing without full demolition.
If the existing drywall is damaged, we’ll remove it, soundproof properly, and refinish.
Will soundproofing help with bass and low-frequency noise?
Yes, but it requires mass. Bass frequencies are harder to block than high frequencies (voices, music treble). That’s why we use heavy materials like MLV, multiple drywall layers, and decoupling—all designed to stop low-frequency transmission.
Can soundproofing be done in a rental property?
If you own the rental property, yes. If you’re a tenant, you’d need landlord approval, and most soundproofing methods aren’t reversible (they involve permanent wall modifications).
For renters, we recommend portable solutions like heavy bookcases against shared walls, acoustic panels, and dense curtains—but these are far less effective than proper wall soundproofing.
How long does soundproofing take?
Most single-wall soundproofing projects take 2-4 days. Full-room soundproofing (multiple walls + ceiling) can take 1-2 weeks depending on complexity.
Is your lifetime warranty transferable if I sell my home?
Yes. The warranty stays with the property, which can be a selling point for future buyers.
Who Needs Soundproofing in Victoria? (You’d Be Surprised)
Condo and townhome owners — shared walls are the #1 reason people call us. You deserve to live in your home without hearing every word your neighbors say.
Work-from-home professionals — if you’re on Zoom calls all day and your home office shares a wall with the living room, kitchen, or neighbor’s unit, soundproofing is a productivity investment.
Parents with young kids — let your kids play, watch TV, and be kids without worrying about disturbing neighbors or waking a sleeping baby in the next room.
Renters (with landlord approval) — if you’re in a long-term rental and the landlord agrees, soundproofing a shared wall can dramatically improve your living situation.
Multi-generational households — aging parents, adult children, or extended family living under one roof need privacy and sound separation.
Home theater / music room owners — if you’ve invested in a sound system or instruments, proper soundproofing lets you enjoy them without complaints.
Landlords and property managers — soundproofing between rental units reduces tenant complaints, increases tenant retention, and makes units more desirable.
New construction / renovation projects — if you’re building or renovating, this is the best time to add soundproofing. It’s cheaper and easier to do during construction than retrofitting later.
Free Soundproofing Assessment for Victoria Homeowners
If you’re dealing with noise issues and you’re ready to do something permanent about it, Finest Finish can help.
We serve Victoria, Oak Bay, Saanich, Esquimalt, View Royal, Langford, Colwood, and the Greater Victoria area.
Here’s how to get started:
- Call or text us: (250) 686-9483
- Tell us about the noise issue: Which walls? What type of noise? How bad is it?
- We’ll schedule a free on-site assessment
- You’ll receive a detailed quote with soundproofing options, expected noise reduction, and warranty details
No pressure. No obligation. Just honest advice from a team that’s been finishing drywall in Victoria since 2014.
Let’s give you your peace and quiet back.
Why Most Soundproofing Jobs Fail (And How to Make Sure Yours Doesn’t)
Mistake #1: Using foam panels and thinking it’s soundproofing.
Foam absorbs echo and improves acoustics inside the room. It does almost nothing to stop sound from leaving or entering. Don’t waste your money.
Mistake #2: Adding one layer of drywall with no decoupling.
This adds a tiny bit of mass, but sound still transfers directly through the studs. You’ll get maybe 10-15% noise reduction—not worth the cost.
Mistake #3: Skipping the air sealing.
Sound travels through air. If you don’t seal every gap, crack, outlet, and penetration, sound will leak through and defeat the entire soundproofing system.
Mistake #4: Using the wrong insulation.
Standard pink fiberglass barely helps. You need dense acoustic insulation (mineral wool or high-density fiberglass) specifically designed to absorb sound energy.
Mistake #5: Hiring a contractor who’s never done soundproofing before.
General handymen and low-bid contractors don’t understand the science. They’ll install materials wrong, skip critical steps, and you’ll end up with minimal improvement and wasted money.
Finest Finish has been doing soundproofing installations in Victoria for over a decade. We know what works. We know what doesn’t. And we guarantee our work for life.
Finest Finish Painting & Drywall
Serving Victoria, BC and the Greater Victoria Area Since 2014
Licensed • Insured • Lifetime Warranty
Call for a Free Soundproofing Assessment: (250) 686-9483