


Check out our reviews!
Some popcorn ceiling jobs are straightforward.
Wet it. Scrape it. Smooth it. Paint it.
And then there are Saanich homes built in the 1960s — split-levels near Broadmead, ranchers in Royal Oak, character homes throughout Cordova Bay — where the ceiling has been accumulating decades of history that you can’t see until you’re standing underneath it with the right knowledge and the right questions.
Heavy texture applied a quarter-inch thick. Settlement cracks that opened up over 40 or 50 years of foundation movement. Paint applied over the original popcorn — sometimes multiple coats — that changed everything about how the job needed to be approached.
And underneath all of it, in homes built before 1986: the possibility of asbestos.
This is where most contractors get it wrong. And where Finest Finish gets it right.
We’ve worked inside Saanich homes that presented every one of these challenges simultaneously. We’ve made real decisions — on real job sites, in real Saanich homes — that protected our clients, preserved their ceilings, and delivered results they described as worth every penny after 15 years of living with something they thought they’d never be able to fix.
This page is about what that actually looks like.
The Saanich Popcorn Ceiling Removal Problem Nobody Talks About
Saanich has one of the highest concentrations of 1960s and 1970s residential construction in Greater Victoria.
Split-levels in Broadmead. Ranchers throughout Royal Oak. Mid-century homes lining the streets of Cordova Bay and Tillicum.
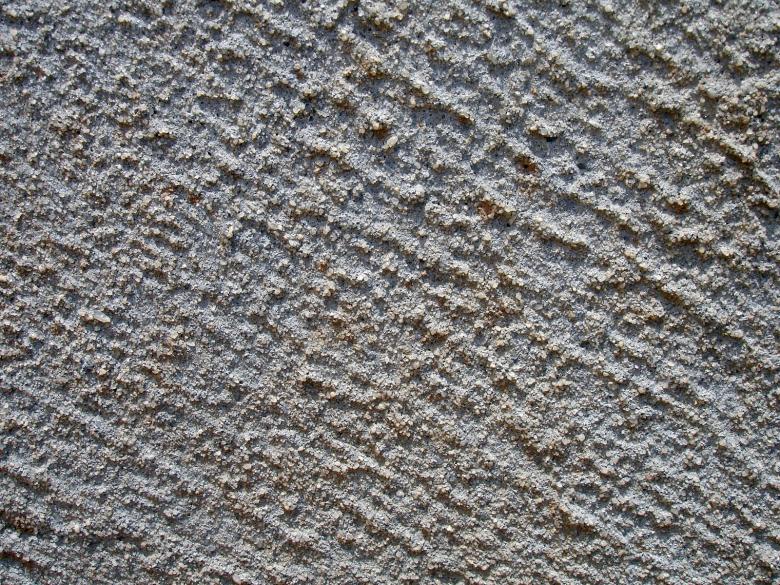
These homes share a common interior feature: heavy popcorn ceilings applied during the era when the texture was standard practice — sprayed thick, often a quarter-inch deep or more, to hide imperfections and speed up construction.
Here’s what 50-60 years does to those ceilings:
The texture hardens and bonds differently than fresh application. Aged popcorn doesn’t respond to standard wet-scrape removal the way newer texture does. It can tear drywall paper, create uneven removal depths, and leave a surface that requires significant remediation before finishing.
Settlement cracks develop through decades of foundation movement. Saanich soil conditions — particularly in the Broadmead area where clay-heavy ground shifts seasonally — create ongoing stress on ceiling assemblies. Cracks that started hairline in 1975 can be significant structural surface fractures by 2024.
Paint layers change everything. Many Saanich homeowners painted over their popcorn ceilings — sometimes multiple times over the decades. Painted popcorn behaves completely differently during removal. And in pre-1986 homes, painted popcorn texture creates a critical safety consideration that changes the entire approach to the job.
That last point is where the real expertise lives.
The Asbestos Reality in Saanich's Pre-1986 Homes
If your Saanich home was built before 1986 — and most Broadmead and Royal Oak split-levels were — asbestos testing before popcorn ceiling removal isn’t optional.
It’s essential.
Asbestos was commonly used in popcorn ceiling texture compounds throughout the 1960s and 1970s. When undisturbed, it poses minimal risk. When disturbed — scraped, sanded, or broken apart — it releases fibres that are classified as a known carcinogen.
What most contractors do: Test, find asbestos, coordinate abatement, remove, refinish.
What the situation sometimes demands: Something more nuanced. More expert. More protective.
The Broadmead Job: A Real Saanich Ceiling That Changed How We Think About This Work
We were called to a 1960s split-level near Broadmead by a homeowner who had lived with a heavy popcorn ceiling for 15 years.
Not because she didn’t want it gone. She’d wanted it gone for years.
Because she’d been told the cost, the process, and the disruption, and she’d been waiting until she could do it properly.
When we assessed the ceiling, here’s what we found:
The texture was heavy. A quarter-inch thick in places — significantly denser than standard popcorn application. This wasn’t a light stipple. This was a substantial textured surface built up over original drywall.
There were structural settlement cracks. Decades of foundation movement in Saanich’s clay-heavy soil had created visible stress fractures across multiple ceiling planes. These weren’t cosmetic hairline cracks. They were surface fractures that needed structural treatment before any finishing could begin.
The texture tested positive for asbestos.
And here’s where the job required real expertise:
The popcorn had been painted over.
Multiple coats of paint applied over decades had sealed the asbestos-containing texture into a contained, encapsulated layer. The fibres weren’t airborne. They weren’t friable. The paint had created a barrier between the texture and the living environment that had held for 50 years.
Scraping would disturb that barrier.
Standard popcorn ceiling removal — wet scrape, clean surface, skim coat — would break through the paint seal, fracture the asbestos-containing texture, and release fibres into the home.
Our decision: don’t scrape. Plaster over.
The Solution: Italian Lime-Base Plaster Over Encapsulated Asbestos Texture
This is the decision that separates experienced Saanich ceiling contractors from everyone else.
Instead of disturbing the asbestos-positive painted texture, we encapsulated it further — permanently — using an Italian lime-base plaster system applied directly over the existing surface.
Here’s why this was the right call:
Italian lime-base plaster is dense, hard, and adhesive. When applied correctly over a painted surface, it bonds mechanically and chemically to create a layer that is effectively rock-hard — more durable than standard joint compound finishing and significantly more stable over time.
The asbestos-containing texture beneath remained completely undisturbed. No fibres released. No abatement required. No risk to the homeowner or our crew.
But the job wasn’t straightforward from there.
The structural cracks required treatment first.
Before any plastering could begin, we addressed the settlement fractures using FibaFuse — a fibreglass mat tape specifically engineered for crack bridging and structural reinforcement. FibaFuse spans the crack and distributes stress across a wider surface area, preventing the fracture from telegraphing through the finished plaster layer.
Here’s where it got technically demanding:
The FibaFuse application over the existing quarter-inch texture created a hump. The tape layer, sitting on top of the textured surface, raised the crack repair above the surrounding ceiling plane.
With a smooth drywall surface, this is manageable — feather the compound, sand flat, done.
Over a quarter-inch popcorn texture, it’s a different problem entirely.
The surrounding ceiling was already elevated by the texture depth. The crack repair hump extended further above that. To achieve a level, flat surface across the entire ceiling plane, we needed to build up the plaster thickness across the full ceiling — not just the crack areas — to bring everything to the same level.
Multiple thick passes of Italian lime-base plaster. Each coat calculated. Each application precise.
Too thin and the hump shows through. Too aggressive and you risk disturbing the texture beneath.
We built it up correctly. Coat by coat. Level by level.
The result:
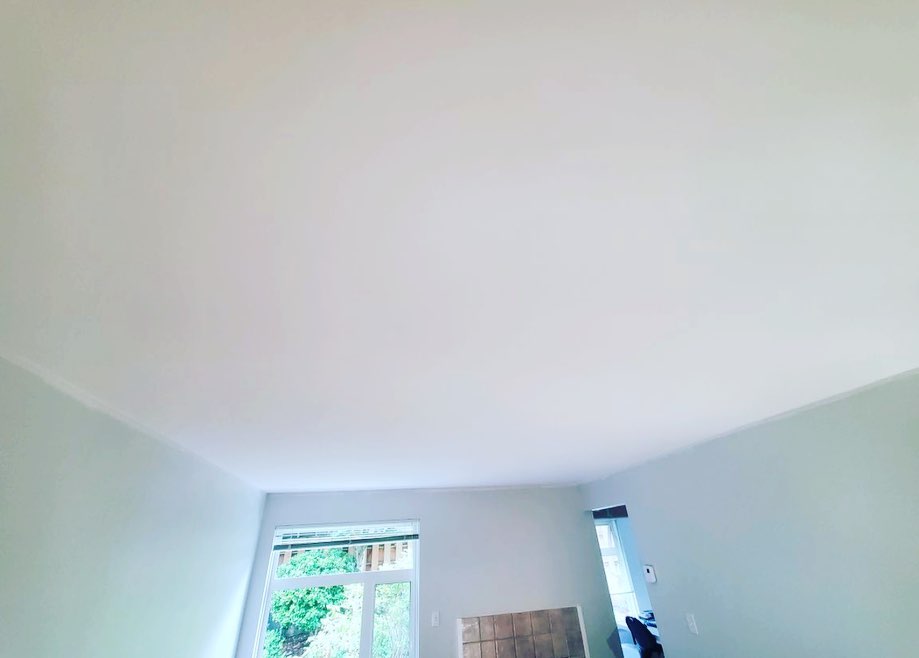
A ceiling that was glass-smooth, structurally reinforced, permanently encapsulated, and completely flat under any lighting condition.
The homeowner — who had waited 15 years to do this properly — walked into the finished room and said it was worth every penny.
That’s the Finest Finish standard.
What Saanich Popcorn Ceiling Removal Actually Involves
Every Saanich ceiling job starts with the same question: what are we actually dealing with?
The answer determines everything — materials, method, timeline, and cost.
Step 1: Assessment & Testing
We assess the texture type, thickness, condition, and age of your Saanich home’s ceiling before touching anything.
For pre-1986 homes — which includes virtually all of Broadmead, Royal Oak, and Cordova Bay’s original housing stock — we coordinate asbestos testing before any work begins.
Testing results determine everything that follows.
Step 2: Structural Crack Evaluation
Settlement cracks in Saanich ceilings aren’t just cosmetic. They indicate ongoing movement in the structure that needs to be addressed before finishing — not covered over and hoped for.
We evaluate crack depth, width, pattern, and cause before recommending treatment. FibaFuse reinforcement for structural fractures. Standard mesh tape for surface cracks. The right solution for the actual problem.
Step 3: Method Determination — Scrape or Plaster
This is the decision most contractors skip.
If the texture is clear of asbestos and responds to wet removal: We scrape, clean, repair, and skim coat to Level 5.
If the texture is asbestos-positive and painted/encapsulated: We plaster over using Italian lime-base plaster — permanently sealing the texture without disturbing it. No abatement. No fibre release. No risk.
If the texture is too heavy, too hard, or too damaged for clean removal: We assess whether plastering over delivers a better long-term result than attempting removal.
Most contractors don’t offer the plastering-over option because it requires different skills, different materials, and a deeper understanding of what’s actually happening in the ceiling assembly.
We offer it because it’s sometimes the right answer.
Step 4: Crack Repair & Structural Reinforcement
FibaFuse over structural fractures. Multiple coats of fibre-reinforced compound. Full cure time between coats. No rushing.
Step 5: Plaster or Skim Application
Multiple coats. Italian lime-base for encapsulation jobs. Premium joint compound for standard removal and skim. Each coat calculated for thickness and level.
Step 6: Level 5 Finishing
Precision sanding between coats. Final skim over the entire ceiling plane. Glass-smooth result that passes the flashlight test under any lighting condition.
Step 7: Prime & Paint
Precision sanding between coats. Final skim over the entire ceiling plane. Glass-smooth result that passes the flashlight test under any lighting condition.
Step 8: Cleanup
HEPA filtration throughout. Plastic sheeting containment. Daily cleanup. Your Saanich home left cleaner than we found it.
Why the "Just Scrape It" Approach Fails in Saanich Homes
We get called to fix bad popcorn ceiling removal jobs in Saanich regularly.
Here’s what the wrong approach looks like:
Contractor skips asbestos testing — because testing costs money and time. Scrapes asbestos-positive texture. Homeowner is now living in a home with disturbed asbestos fibres. Remediation cost: $5,000-$15,000 minimum.
Contractor scrapes too aggressively — tears drywall paper on 60-year-old gypsum board that wasn’t designed to be scraped. Surface is now damaged beyond skim coating. Full drywall replacement required.
Contractor ignores structural cracks — skims over settlement fractures without reinforcement. Cracks telegraph through the finish within 6-12 months. Back to square one.
Contractor uses standard joint compound over heavy texture — doesn’t build up enough thickness to achieve level surface. Flashlight test reveals waves, humps, and uneven planes. Looks fine until natural light hits it at an angle.
Every one of these mistakes costs the homeowner twice.
Once for the contractor who got it wrong. Again for Finest Finish to fix it properly.
What Popcorn Ceiling Removal Costs in Saanich
Pricing depends on:
- Ceiling square footage
- Texture type and thickness
- Asbestos testing results
- Structural crack complexity
- Method (scrape and skim vs. plaster over)
- Paint and primer (if included)
Standard popcorn ceiling removal (no asbestos, light texture): $6.00 – $8.00 per square foot
Heavy texture removal or plaster-over (asbestos-positive painted texture): $8.00 – $10.00 per square foot
Structural crack repair: $300 – $800 depending on extent (often included in ceiling scope)
Asbestos testing: $300 – $500 (required for all pre-1986 Saanich homes)
Example pricing for typical Saanich homes:
- 1,200 sq ft Broadmead split-level: $7,200 – $12,000
- 1,600 sq ft Royal Oak rancher: $9,600 – $16,000
- 2,000 sq ft Cordova Bay home: $12,000 – $20,000
The reality:
The homeowner near Broadmead waited 15 years to do this properly. When she finally did — with the right contractor, the right materials, and the right approach — she said it was worth every penny.
That’s the return on doing it right the first time.
The Finest Finish Lifetime Warranty
Industry standard warranty for ceiling work in BC: two years.
Finest Finish warranty: lifetime.
If the plaster cracks, the finish separates, or the surface fails due to our workmanship — we come back and fix it at no cost. Not in two years. Not in ten years. Forever.
The warranty is transferable. It stays with the Saanich property when you sell.
Why can we offer this when other contractors won’t?
Because Italian lime-base plaster over properly prepared surfaces doesn’t fail. Because FibaFuse reinforced crack repairs don’t telegraph through. Because Level 5 finishing over correctly built-up plaster coats doesn’t show imperfections under any lighting.
We build ceilings that last. Then we guarantee them for life.
Free Quote for Saanich Homeowners Ready to Finally Get Rid of That Ceiling
If you’ve been living with a popcorn ceiling in your Saanich home — whether it’s been 2 years or 15 — Finest Finish can help.
We serve Broadmead, Royal Oak, Cordova Bay, Tillicum, Quadra, and all of Saanich and Greater Victoria.
Here’s how to get started:
- Call or text: 250-686-9483
- Tell us about your ceiling: Age of home, texture type, any visible cracks
- We’ll schedule a free on-site assessment
- You’ll receive a detailed quote with method recommendation, timeline, and lifetime warranty details
No pressure. No obligation. Honest advice from a team that’s been finishing Saanich ceilings since 2014.
Let’s finally get that ceiling done properly.
