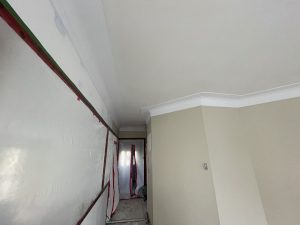
Drywall installation might seem straightforward, but it requires careful planning, precision, and expertise to achieve a flawless finish. Even small mistakes can lead to significant issues down the line, affecting both the aesthetics and structural integrity of the walls. In this blog post, we’ll explore some of the most common drywall installation mistakes and provide tips on how to avoid them, ensuring a professional-quality result every time.
1. Incorrect Measurements and Cutting
The Mistake:
- Inaccurate Measurements: Failing to measure accurately can lead to drywall sheets that don’t fit properly, resulting in gaps, uneven edges, and wasted materials.
- Improper Cutting: Cutting drywall sheets incorrectly can create jagged edges and weaken the drywall, making it more susceptible to damage.
How to Avoid It:
- Measure Twice, Cut Once: Always double-check your measurements before cutting. Use a tape measure and mark the drywall carefully.
- Use the Right Tools: Utilize a T-square and a utility knife for straight cuts. For more complex shapes, consider using a drywall saw.
- Score and Snap Method: Score the drywall with a utility knife along a straight edge, then snap it along the scored line for a clean break.
Detailed Tips:
- Precision Tools: Invest in high-quality measuring and cutting tools. Laser measures can provide highly accurate measurements, and a good utility knife with replaceable blades ensures clean cuts.
- Templates for Complex Cuts: For areas around outlets or irregular shapes, use templates made from cardboard to ensure accuracy before transferring the measurements to the drywall.
2. Poor Framing and Structural Support
The Mistake:
- Inadequate Support: Installing drywall on poorly framed walls can result in a lack of support, leading to sagging and cracks.
- Incorrect Fastener Placement: Placing screws or nails too close to the edges or too far apart can compromise the drywall’s stability.
How to Avoid It:
- Check the Framing: Ensure that the wall framing is level, plumb, and adequately spaced (typically 16 inches on center).
- Proper Fastening: Use drywall screws or nails and place them at least 3/8 inch from the edges of the drywall. Space fasteners 8-12 inches apart along the studs.
Detailed Tips:
- Reinforce Weak Spots: Add extra studs or blocking where heavy fixtures will be mounted or in areas of high traffic.
- Use a Stud Finder: For renovations, use a stud finder to locate existing studs behind finished walls accurately.
3. Over-Screwing or Under-Screwing Drywall
The Mistake:
- Over-Screwing: Driving screws too deep can break the paper surface of the drywall, reducing its holding power and leading to weak spots.
- Under-Screwing: Leaving screws protruding can create bumps and make it difficult to achieve a smooth finish.
How to Avoid It:
- Set the Right Depth: Use a screw gun with an adjustable depth setting or a drywall screw setter bit to ensure screws are driven to the correct depth.
- Check Each Screw: Ensure that screws are flush with the surface of the drywall without breaking the paper.
Detailed Tips:
- Use a Dimpler: A dimpler is a tool designed to ensure screws are driven to the correct depth without damaging the drywall surface.
- Inspect Work: After screwing, run a flat tool or your hand over the surface to check for any screws that need adjusting.
4. Improper Joint Treatment
The Mistake:
- Inadequate Taping: Failing to properly embed the tape in the joint compound can lead to bubbles, loose tape, and visible seams.
- Poor Mudding Technique: Applying joint compound unevenly or too thickly can create ridges and bumps, making sanding difficult and time-consuming.
How to Avoid It:
- Embed the Tape: Apply a thin layer of joint compound to the seam, then press the tape into the compound, ensuring it is fully embedded without bubbles.
- Feather the Edges: Apply subsequent coats of joint compound, feathering the edges to blend seamlessly with the drywall. Each coat should be wider than the last.
- Allow Proper Drying Time: Let each coat of compound dry completely before applying the next to avoid cracks and shrinkage.
Detailed Tips:
- Use Mesh Tape for Strength: In areas prone to cracking, consider using fiberglass mesh tape for added strength.
- Thin Coats: Apply compound in thin coats and build up layers gradually to avoid cracking and reduce sanding effort.
5. Inadequate Sanding
The Mistake:
- Over-Sanding: Excessive sanding can create dips and uneven surfaces, especially if it removes too much joint compound.
- Under-Sanding: Insufficient sanding leaves bumps and ridges that are visible once the wall is painted.
How to Avoid It:
- Use the Right Grit: Start with a medium-grit sandpaper (100-120 grit) for initial sanding, then finish with a fine-grit sandpaper (220 grit) for a smooth surface.
- Sand Lightly: Sand gently and evenly, checking the surface frequently to ensure smoothness. Use a sanding block to maintain even pressure.
Detailed Tips:
- Light Source: Use a bright light or a handheld lamp to highlight imperfections while sanding.
- Dust Control: Use a dust-free sander or attach a vacuum to your sander to reduce dust and keep the work area clean.
6. Ignoring Moisture and Temperature Conditions
The Mistake:
- High Humidity: Installing drywall in high humidity can lead to moisture absorption, causing the drywall to swell and joints to crack.
- Temperature Extremes: Extreme temperatures can affect the drying time of joint compound and lead to cracks.
How to Avoid It:
- Control the Environment: Maintain a controlled environment during installation. Ideal conditions are temperatures between 55°F and 70°F and low humidity levels.
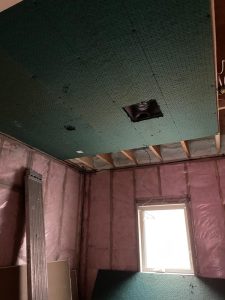
- Use Moisture-Resistant Drywall: In areas prone to moisture, such as bathrooms and basements, use moisture-resistant drywall (green board or cement board).
Detailed Tips:
- Dehumidifiers: Use dehumidifiers in humid environments to keep moisture levels in check during installation and drying.
- Acclimatize Materials: Allow drywall to acclimate to the room conditions for 24-48 hours before installation.
7. Skipping the Primer
The Mistake:
- Skipping Primer: Applying paint directly to drywall without priming can result in poor paint adhesion, uneven color, and visible joint compound.
How to Avoid It:
- Always Prime: Apply a high-quality drywall primer to seal the surface and create an even base for paint. Priming helps the paint adhere better and provides a uniform finish.
Detailed Tips:
- Tinted Primer: Use a tinted primer that matches the paint color to enhance coverage and reduce the number of paint coats needed.
- Stain-Blocking Primer: In areas prone to stains or discoloration, use a stain-blocking primer to prevent bleed-through.
8. Improper Handling and Storage of Drywall
The Mistake:
- Mishandling Sheets: Dropping or leaning drywall sheets can damage the edges and corners, leading to wasted materials.
- Poor Storage Conditions: Storing drywall in damp or unstable environments can cause warping and mold growth.
How to Avoid It:
- Handle with Care: Carry drywall sheets vertically to prevent bending and damage. Use drywall carriers or team lifts for larger sheets.
- Store Properly: Store drywall sheets flat in a dry, stable environment to prevent warping and exposure to moisture.
Detailed Tips:
- Protect Edges: Use corner protectors when moving drywall sheets to prevent damage to the edges.
- Elevate Off the Floor: Store drywall off the ground on a flat surface to avoid moisture absorption and warping.
Conclusion
Avoiding common drywall installation mistakes is crucial for achieving a professional finish and ensuring the longevity of the walls. By paying attention to details like measurements, fastening, joint treatment, and environmental conditions, you can prevent issues and deliver high-quality results. For complex projects or when in doubt, consider hiring a professional drywall contractor who has the expertise and experience to handle all aspects of drywall installation with precision and care.
Proper drywall installation not only enhances the aesthetic appeal of a space but also contributes to its structural integrity and durability. Educating clients about these common mistakes and their solutions can help them appreciate the value of professional drywall services and the importance of meticulous workmanship. For flawless drywall installation and finishing, trust the experts at [Your Company Name] to deliver exceptional results every time.
By focusing on these points, you can create a comprehensive and informative blog post that helps clients understand the complexities of drywall installation and the importance of professional services. This not only positions your company as an authority in the field but also builds trust with your audience, encouraging them to choose your services for their drywall needs.

