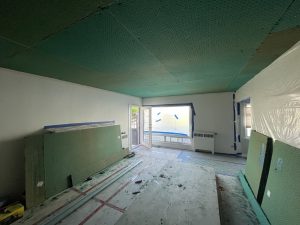
Drywall repair is a common task for homeowners and DIY enthusiasts, and achieving a flawless finish involves mastering the art of drywall sanding. This seemingly simple step is often underestimated, but its importance cannot be overstated when it comes to creating a seamless and professional-looking surface. In this comprehensive guide, we will explore why proper drywall sanding techniques are crucial and provide detailed tips for achieving the best results.
Understanding the Role of Drywall Sanding
1. Surface Preparation: Proper surface preparation is the foundation of any successful drywall repair project. Before diving into the intricacies of sanding, it’s crucial to ensure that the repaired area is clean and free of debris. Sanding comes into play to refine the surface further, removing imperfections left from the repair process.
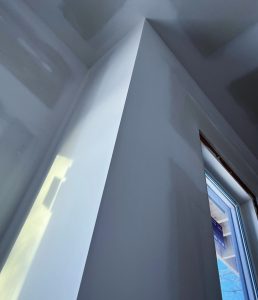
2. Seamless Blending: Whether you’re patching a small hole or conducting a more extensive repair, achieving a seamless blend between the repaired section and the existing drywall is paramount. Sanding helps feather the edges of the patch, creating a gradual transition and minimizing the visual impact of the repair.
3. Texture Matching: For repairs that involve recreating a specific texture on the drywall, proper sanding is essential. It allows for the refinement of the texture, ensuring that it matches the surrounding wall. Consistency in texture is particularly critical in high-visibility areas where any discrepancies would be readily noticeable.
4. Paint Adhesion: One of the primary purposes of sanding is to enhance paint adhesion. A well-sanded surface provides an optimal substrate for paint, allowing it to adhere evenly. This not only contributes to a smoother finish but also prevents issues such as peeling or uneven color absorption, ensuring a durable and long-lasting result.
5. Professional Appearance: Whether you’re a seasoned contractor or a DIY enthusiast, the appearance of your work speaks volumes about your skills. Proper drywall sanding contributes to a professional look, reflecting attention to detail and a commitment to quality craftsmanship. It’s the finishing touch that transforms a repair into a seamless part of the overall wall.
6. Avoiding Common Mistakes: Without a doubt, improper sanding can lead to visible flaws that diminish the quality of your drywall repair. Common mistakes include scratches, gouges, and uneven surfaces, all of which can be avoided by employing the right sanding techniques and tools.
Tips for Effective Drywall Sanding
1. Choose the Right Sandpaper:
The type of sandpaper you use can significantly impact the outcome of your sanding efforts. For drywall sanding, it’s recommended to use a fine-grit sandpaper, typically in the range of 120 to 150 grit. This grit range is ideal for smoothing the surface without causing unnecessary damage.
2. Sanding Tools:
Selecting the appropriate tools is equally important. While smaller repairs may require handheld sanding blocks, larger areas benefit from a pole sander or sanding pole. These tools help maintain even pressure across the surface, preventing uneven sanding.
3. Circular Motion:
When sanding, opt for a circular motion rather than a back-and-forth motion. Circular sanding minimizes the risk of creating noticeable patterns on the drywall surface. It distributes the sanding pressure more evenly, resulting in a smoother finish.
4. Gradual Pressure Application:
Start with light pressure when sanding and gradually increase it as needed. This approach allows you to control the sanding process, preventing over-sanding or causing unnecessary damage to the drywall surface. It’s particularly crucial when working on delicate areas or near the edges of the repair.
5. Sanding Blocks for Precision:
For precise and targeted sanding, especially around corners or smaller repairs, consider using a sanding block. Sanding blocks provide stability and control, allowing you to focus on specific areas that need attention.
6. Dust Control:
Drywall sanding generates a significant amount of dust, which can be harmful when inhaled and create a mess in your workspace. Always wear a dust mask and safety goggles to protect yourself. Additionally, consider using a vacuum or dust collector attachment on your sanding tool to minimize airborne dust.
7. Check Your Progress:
Regularly inspect the sanded surface to evaluate your progress. This step helps you identify any uneven areas or imperfections that may require additional attention. It’s easier to address issues as they arise rather than discovering them after the painting stage.
8. Feathering Edges:
When blending the repaired section with the existing drywall, pay special attention to feathering the edges. Gradually taper the sanded area to create a smooth transition, making the repair less conspicuous. Feathering is crucial for achieving that seamless integration.
9. Sanding Between Coats:
If your repair involves multiple layers of joint compound or patching material, sanding between coats is essential. This step ensures that each layer is smooth and free of imperfections before applying the next. It contributes to the overall quality of the repair and the final paint finish.
10. Safety First:
Always prioritize safety when sanding drywall. In addition to wearing a dust mask and safety goggles, consider using protective clothing to prevent skin irritation. Adequate ventilation in the workspace is also crucial to minimize exposure to dust particles.
Conclusion
Mastering the art of drywall sanding is a journey that requires patience, attention to detail, and the right tools. By understanding the role of sanding in surface preparation, blending, texture matching, paint adhesion, and achieving a professional appearance, you can elevate the quality of your drywall repair projects.
Remember that each step in the drywall repair process contributes to the overall success of the project. Proper sanding is not merely a final touch but an integral part of creating a flawless and long-lasting finish. Whether you’re a seasoned professional or a DIY enthusiast, investing time and effort in mastering drywall sanding techniques will undoubtedly pay off in the form of beautifully repaired and finished walls.