Drywall, also known as gypsum board or wallboard, is a staple of modern construction. Its ease of installation, versatility, and cost-effectiveness make it a popular choice for covering interior walls and ceilings. However, like any building material, drywall is not immune to problems that can arise during or after installation. Whether you’re a seasoned DIY enthusiast or a novice tackling your first drywall project, understanding how to address and fix common drywall problems is essential for achieving a smooth, professional finish. In this comprehensive guide, we will walk you through the most frequent drywall issues and provide detailed solutions.
1. Popped Nails or Screws:
Issue: Over time, the nails or screws used to secure drywall can pop out, leaving unsightly bulges and sometimes even small holes or cracks.
Solution:
Identify the Problem: Begin by identifying the popped nail or screw. Typically, these issues are more common in older drywall or in areas that experience temperature fluctuations.
Gently Tap Back In: With a hammer, gently tap the protruding nail or screw back into the drywall. This will push it below the surface.
Secure with a New Fastener: To prevent future pops, it’s a good idea to replace the problematic fastener with a slightly longer one that can securely penetrate the wall stud. This will provide a more stable anchoring point and reduce the likelihood of the issue reoccurring.
2. Cracks in Drywall:
Issue: Cracks in drywall can occur due to a variety of factors, including settling of the building, temperature changes, or poor installation.
Solution:
Clean the Crack: Begin by cleaning out the crack and removing any loose debris or dust. A putty knife or a utility knife can help with this process.
Apply Joint Compound: Use joint compound (also known as mud) to fill the crack. Apply a thin layer and feather the edges. Ensure that the compound is smooth and level with the surrounding drywall surface.
Allow to Dry and Sand: Let the joint compound dry completely according to the manufacturer’s instructions. Once dry, sand the repaired area until it is smooth and blends seamlessly with the rest of the wall.
Repeat if Necessary: In some cases, multiple applications of joint compound may be required to completely fill and repair larger cracks. Ensure each layer is allowed to dry and is sanded before applying the next.
Finish with Primer and Paint: Once the repair is smooth and the crack is no longer visible, finish the area with primer and paint to match the surrounding wall.
3. Bulging Seams:
Issue: Bulging seams can occur when seams between drywall sheets aren’t properly finished, or the joint compound has cracked and pushed the tape away.
Solution:
Remove Loose Material: Begin by removing any loose or damaged tape or joint compound from the bulging seam. You can use a utility knife or a putty knife for this purpose.
Reapply Joint Tape: Apply new joint tape to the seam, ensuring it’s properly aligned with the drywall edges.
Apply Joint Compound: Using a wider putty knife, apply a thin layer of joint compound over the tape, feathering it out to create a seamless transition between the tape and the drywall.
Allow to Dry and Sand: Allow the joint compound to dry completely, and then sand it smooth, blending it into the surrounding wall.
Repeat If Necessary: Depending on the severity of the bulge, you may need to repeat the process, applying additional layers of joint compound and tape until the seam is smooth and blends with the rest of the wall.
Finish with Primer and Paint: Once the repair is complete and the seam is no longer visible, finish the area with primer and paint to match the surrounding wall.
4. Small Holes and Dents:
Issue: Small holes and dents in drywall can occur due to accidents, impacts, or the removal of wall fixtures.
Solution:
Clean the Damaged Area: Begin by cleaning the damaged area and removing any loose debris or dust.
Fill the Hole or Dent: Use spackling or joint compound to fill the hole or dent. Apply the material with a putty knife, pressing it into the damaged area. Ensure the repair is slightly raised above the surrounding surface to allow for sanding.
Allow to Dry and Sand: Let the spackling or joint compound dry completely. Once dry, sand the repaired area until it is smooth and blends seamlessly with the rest of the wall.
Repeat If Necessary: For larger holes or dents, you may need to apply additional layers of spackling or joint compound, allowing each layer to dry and sanding between applications until the repair is smooth.
Finish with Primer and Paint: After completing the repair, finish the area with primer and paint to match the surrounding wall.
5. Water Damage:
Issue: Water can cause significant damage to drywall, including discoloration, bubbling, and weakening of the material.
Solution:
Locate and Repair the Source: Before addressing the drywall damage, it’s essential to locate and repair the source of the water damage, which could be a leaky roof, plumbing issue, or a damaged seal around windows or doors.
Cut Out the Damaged Area: Using a utility knife or a drywall saw, cut out the damaged section of drywall. Ensure that the edges are smooth and even to provide a proper surface for repair.
Replace with New Drywall: Cut a new piece of drywall to fit the opening you’ve created. Secure it to the wall studs with screws or nails, ensuring it’s flush with the surrounding drywall.
Tape and Mud Seams: Apply joint tape to the seams where the new drywall meets the existing drywall. Apply joint compound over the tape, feathering it out to create a smooth transition.
Allow to Dry and Sand: Let the joint compound dry completely, and then sand the repaired area until it is smooth and blends with the surrounding wall.
Finish with Primer and Paint: Once the repair is complete and the wall is smooth and even, finish the area with primer and paint to match the surrounding wall.
6. Peeling Paint or Finish:
Issue: Over time, the paint or finish on drywall may begin to peel or bubble, which can be unsightly.
Solution:
Scrape Off Loose Paint or Finish: Use a paint scraper or putty knife to carefully remove any loose or peeling paint or finish from the affected areas.
Patch with Spackling or Joint Compound: Patch any areas where the paint or finish has been removed with spackling or joint compound. Apply the material smoothly and evenly.
Sand the Repaired Areas: Once the spackling or joint compound is dry, sand the repaired areas until they are smooth and blend seamlessly with the surrounding wall.
Prime and Repaint: Apply a coat of primer to the patched areas, and once it’s dry, repaint the entire wall to ensure a consistent finish. Be sure to match the paint color and finish with the rest of the wall.
7. Sags and Bumps in Drywall:
Issue: Sagging or uneven areas in drywall can occur due to improper installation, especially on ceilings.
Solution:
Reinforce with Screws or Nails: In areas with sagging or bumps, locate the problem and insert additional screws or nails to reattach the drywall to the wall or ceiling framing.
Spackling and Sanding: Fill any uneven or damaged areas with spackling or joint compound, then sand the area smooth.
Apply a Thin Coat of Joint Compound: Apply a thin coat of joint compound over the entire surface, feathering it out to create a level, smooth finish.
Sand and Finish: After the joint compound has dried, sand the surface until it is smooth and level. Finish by applying primer and paint.
8. Texture Matching:
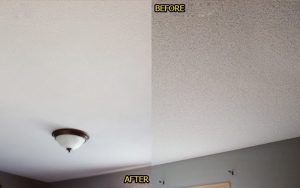
Issue: If you have had to repair a section of drywall, achieving a texture that matches the surrounding wall can be challenging.
Solution:
Experiment with Techniques: If you’re dealing with a textured wall, experiment with different techniques to recreate the texture. Common methods include using a stippling brush, a sponge, or a texture spray gun.
Practice on Scrap Material: Before applying the texture to the repaired area, practice on a piece of scrap drywall or cardboard to ensure you’ve matched the texture correctly.
Apply the Texture: Once you’re confident in your technique, apply the texture to the repaired area, taking care to match the surrounding wall as closely as possible.
Allow to Dry and Paint: Let the texture dry completely before painting. It’s important to use the same paint color and finish as the rest of the wall to ensure a seamless blend.
9. Repetitive Issues:
Issue: If you find that drywall problems are recurring, it may be a sign of a more significant underlying issue, such as structural problems or water leaks.
Solution:
- Consult a Professional: If you’re experiencing repetitive drywall issues, it’s advisable to consult with a professional contractor. They can assess the situation, identify the root causes, and provide long-term solutions to prevent further problems.
10. Prevention and Maintenance:
Preventing drywall problems is the best approach to maintaining the integrity and appearance of your walls and ceilings. Here are some tips for preventing common issues:
- Ensure that drywall is installed correctly, with screws or nails spaced at appropriate intervals and securely fastened to wall studs or ceiling joists.
- Use the right type of drywall for the environment. For example, use moisture-resistant drywall in bathrooms or kitchens.
- Keep the interior of your home well-maintained to prevent water leaks or excessive moisture that can damage drywall.
- Regularly inspect your walls and ceilings for signs of damage and address any issues promptly to prevent them from worsening.
Conclusion
Drywall is a ubiquitous building material that is both versatile and relatively easy to work with. However, it is not immune to problems that can occur during or after installation. The ability to recognize and address common drywall issues is essential for achieving a professional finish and maintaining the structural integrity of your walls and ceilings.
In this comprehensive guide, we’ve provided detailed solutions for repairing common drywall problems, such as popped nails or screws, cracks, bulging seams, small holes and dents, water damage, peeling paint or finish, sags and bumps, and texture matching. We’ve also emphasized the importance of addressing repetitive issues by consulting a professional contractor who can identify and resolve underlying causes.
By following the step-by-step instructions and tips outlined in this guide, you can confidently tackle common drywall problems, restoring the beauty and functionality of your walls and ceilings. Remember to prioritize safety, wear appropriate protective gear, and follow good ventilation practices when working with drywall materials and compounds.
With the knowledge and techniques presented here, you can take on drywall repairs with confidence, knowing that you have the skills to achieve a professional finish and maintain the long-term integrity of your home’s interior surfaces.


