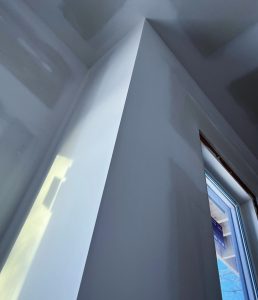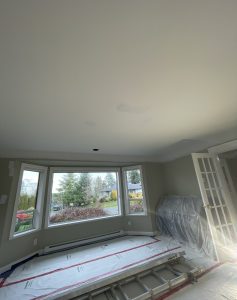
Texture matching in home improvement is a meticulous process that involves ensuring that new materials or finishes applied to a space closely match the existing textures or finishes. Whether you are remodeling a room, repairing damaged surfaces, or making upgrades to your home, texture matching plays a significant role in achieving a cohesive and visually appealing result. In this comprehensive guide, we will explore the benefits, techniques, and considerations related to texture matching in home improvement.
The Importance of Texture Matching in Home Improvement
The texture of surfaces in your home, such as walls, ceilings, and floors, contributes significantly to the overall aesthetics and ambiance of the space. When undertaking home improvement projects, it’s essential to consider texture matching for several compelling reasons:
1. Aesthetic Continuity
A key advantage of texture matching is its ability to maintain aesthetic continuity throughout your home. When new materials seamlessly blend with existing ones, it creates a harmonious visual flow. This consistency enhances the overall appeal of your living spaces and contributes to a sense of unity and balance.
Imagine you’re renovating a room with an existing textured plaster wall finish. Without proper texture matching, the newly applied plaster may have a different texture, making it stand out and disrupting the room’s overall design. Texture matching ensures that the new and old surfaces coexist harmoniously, resulting in a polished and cohesive appearance.
2. Increased Property Value
Texture matching can positively impact the resale value of your home. Potential buyers are often drawn to properties that appear well-maintained and visually appealing. When you’ve invested in texture matching during your home improvement projects, you’re essentially enhancing the marketability of your property.
Prospective buyers are more likely to appreciate a home where they can see the care and attention to detail in the renovation work. Whether it’s a carefully matched stucco finish on the exterior or consistent textures throughout the interior, these details can influence their decision to purchase and potentially even justify a higher price.
3. Cost-Effective Solutions
Home improvement projects can vary widely in terms of cost. Texture matching, when done correctly, can be a cost-effective approach. Instead of completely overhauling surfaces, you can make targeted improvements to match the existing texture. This can result in significant cost savings compared to extensive renovations or replacements.
For instance, if you have a wall with a damaged section of textured paint, texture matching allows you to repair the damaged area without repainting the entire wall. This targeted approach not only saves money but also minimizes the disruption to your living space.
4. Avoiding Patchy Appearance
One of the most common issues in home improvement is a patchy appearance. When new surfaces or materials are not adequately matched to the existing ones, patched areas can stand out and look unsightly. Texture matching is a solution to this problem, ensuring that repairs or updates blend seamlessly with the surroundings.
Patchy appearances can be particularly noticeable on walls and ceilings, where differences in texture are readily apparent. Texture matching prevents these inconsistencies, creating a polished and professional result.
5. Reduced Maintenance
Different textures have varying levels of ease when it comes to cleaning and maintenance. Texture matching allows you to ensure that new surfaces are as easy to clean and care for as the existing ones. This can be particularly important in high-traffic areas or rooms prone to splashes and spills, such as kitchens and bathrooms.
For example, when updating your kitchen countertops, you can choose a material with a texture that matches the surrounding cabinetry or backsplash. This not only enhances the visual appeal but also simplifies maintenance, as there are no abrupt transitions between textures that could collect dirt or grime.
6. Concealing Imperfections
Over time, surfaces in your home may develop imperfections, such as cracks, dents, or unevenness. Texture matching can help conceal these flaws effectively. By carefully matching the existing texture, you can make imperfections less noticeable, achieving a smoother and more polished finish.
Consider a scenario where your ceiling has developed cracks due to settling or temperature fluctuations. Instead of simply patching the cracks, texture matching allows you to blend the repaired areas seamlessly with the surrounding ceiling texture, making the imperfections virtually disappear.
7. Versatility in Design
Texture matching provides a level of design versatility that can be incredibly valuable in home improvement. It allows you to introduce new elements or materials without disrupting the overall aesthetic of a space. This flexibility enables you to explore creative design options while maintaining the existing texture’s integrity.
For instance, if you’re updating your bathroom, you can install a modern, textured tile that complements the existing textures in the room. This design choice adds a contemporary touch to the space while ensuring that it still feels cohesive and in harmony with the rest of your home.
8. Preservation of Original Character
In older homes, texture matching can play a vital role in preserving the original character and charm of the property. Historical or vintage homes often have distinctive textures, such as ornate plasterwork or unique wall treatments. When making repairs or updates in these homes, texture matching allows you to maintain the authenticity of these architectural features.
Preserving the original character can be particularly important if your home is designated as historically significant or if you have a personal attachment to its unique design elements. Texture matching ensures that any necessary renovations do not compromise the home’s historical value or character.
9. Faster Project Completion
Texture matching can expedite the renovation process. Instead of tearing out and replacing entire surfaces, you can work with what’s already in place, saving time and labor. This can be especially advantageous when you have limited time for a project or if you want to minimize disruptions to your daily life during the renovation.
For instance, if you’re updating the flooring in your living room, texture matching allows you to install new flooring that seamlessly integrates with the existing floor in adjoining rooms. This approach eliminates the need for extensive subfloor work and accelerates the project timeline.
10. Enhanced Comfort
Texture isn’t solely a visual element; it can also have a tactile or sensory impact. When texture matching is applied to surfaces you frequently touch or interact with, it can enhance the overall comfort and feel of your living spaces.
Consider the texture of kitchen countertops or bathroom vanities. These surfaces are not only visual focal points but also areas where you engage with your home daily. Texture matching ensures that these surfaces are both visually pleasing and comfortable to use.
11. Eco-Friendly Approach
Sustainability and environmental considerations are increasingly important in modern home improvement. Texture matching can align with eco-friendly principles by minimizing waste and resource consumption. When you match existing textures rather than replacing entire surfaces, you reduce the need for new materials and limit waste generation.
Furthermore, reusing existing materials can extend the lifespan of your home’s surfaces, reducing the frequency of replacements and conserving resources over time. This eco-conscious approach to home improvement contributes to a greener and more sustainable living environment.
Texture Matching Techniques in Home Improvement
Achieving successful texture matching in home improvement requires a combination of skill, technique, and attention to detail. Here are some key techniques commonly employed for texture matching:
1. Surface Preparation
Before attempting to match a texture, it’s essential to properly prepare the surface. This typically involves cleaning, repairing, and priming the area to ensure a smooth and even base. Remove any dirt, dust, or loose material, and repair any cracks, holes, or imperfections. Apply a suitable primer to promote adhesion and create a uniform surface.
Surface preparation is especially crucial when matching textures on walls and ceilings, as these areas are more likely to show imperfections. The condition of the surface will significantly impact the success of texture matching, so investing time in this phase is essential.
2. Identifying the Existing Texture
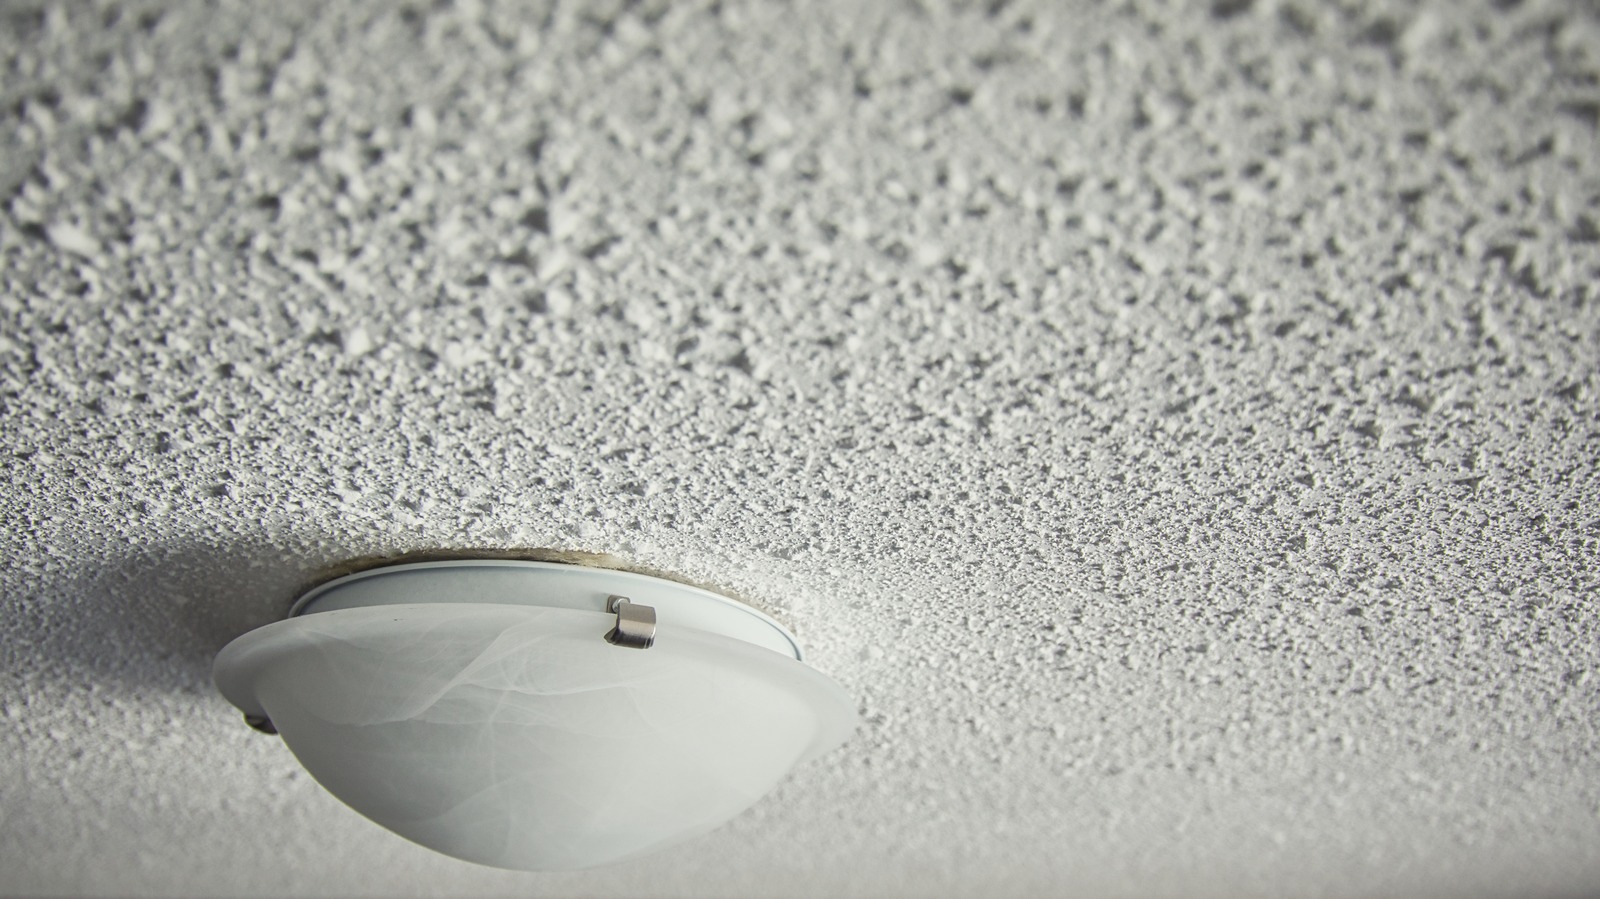
To achieve an accurate texture match, it’s crucial to identify and understand the existing texture. Textures can vary widely, from smooth surfaces to highly textured ones like popcorn ceilings, stucco finishes, or knockdown textures. Take the time to closely examine the texture, noting its pattern, depth, and overall appearance.
Understanding the existing texture’s characteristics will help you select the right materials and techniques for the texture matching process. It’s also advisable to document your findings, either through photographs or written notes, to reference during the matching process.
3. Texture Material Selection
Selecting the appropriate materials for texture matching is a critical step. The choice of materials will depend on the type of texture you’re matching. Here are some common texture materials and their applications:
Drywall Compound: This is a versatile material suitable for creating a wide range of textures, from smooth to moderately textured finishes. It’s often used for repairs and patching.
Texture Sprays: Texture sprays come in various formulations, such as orange peel, popcorn, or knockdown textures. These are typically used for ceilings and walls.
Plaster: Plaster can be used to create more intricate and decorative textures, such as swirls or patterns. It’s commonly employed in older homes with ornate plasterwork.
Stucco: Stucco is an exterior texture material used for walls. It provides a rugged, textured finish that can be matched for repairs or renovations.
Tile: Tile materials come in various textures, and they are commonly used for flooring and backsplashes. Matching tile textures can be essential for achieving a seamless look.
Wood: Wood surfaces, such as hardwood flooring or wood paneling, have distinct textures that can be matched during repairs or refinishing.
Stone: Stone surfaces, like granite countertops, have unique textures that can be replicated when replacing or repairing them.
Select the material that best aligns with the existing texture, and ensure you have the necessary tools and equipment for its application.
4. Trial and Error
Texture matching often involves a degree of trial and error, especially if you’re attempting to match a complex or unique texture. It’s advisable to practice on a small, inconspicuous area or a test board before applying the texture to the target surface.
During the trial phase, you can experiment with different application techniques, adjust the thickness of the material, and refine your approach until you achieve a close match to the existing texture. Patience and persistence are key to mastering texture matching.
5. Application Techniques
The technique you use to apply the texture is critical in achieving a seamless match. Different textures require specific application methods. Here are some common texture application techniques:
Spraying: Texture sprayers are commonly used for ceilings and walls. They allow for even distribution of texture material and can create various patterns, from fine splatters to larger textures like knockdown or popcorn.
Troweling: Troweling involves using a trowel or spatula to apply and manipulate materials like plaster or stucco. This technique is ideal for achieving handcrafted or sculpted textures.
Rolling: Texture rollers can be used to apply textured patterns to walls and ceilings. This technique is useful for achieving consistent and repetitive patterns.
Stippling: Stippling is a technique where a stippling brush or sponge is used to dab texture material onto the surface. It’s often used for creating textured paint finishes.
Hand Techniques: For more intricate textures, such as swirls or patterns, artists’ brushes, sponges, or even your fingers can be employed to apply the texture with precision.
The choice of application technique will depend on the specific texture you’re trying to match and your level of expertise with the chosen method.
6. Texture Blending
Blending the new texture with the existing one is a crucial step in achieving a successful match. To blend textures effectively, follow these guidelines:
Feather the edges: When applying the texture material, feather the edges to create a gradual transition from the new texture to the existing one. This prevents abrupt changes that can make the repair or renovation obvious.
Gradual buildup: Apply the texture material in layers, allowing each layer to dry before adding more. Gradual buildup helps achieve the desired texture depth and prevents over-application.
Mimic the pattern: Pay close attention to the pattern of the existing texture, whether it’s stippling, swirls, or another design. Try to replicate this pattern as closely as possible when applying the new texture.
Consistency: Maintain a consistent approach and pressure when applying the texture. Inconsistent application can result in variations in texture depth and appearance.
7. Paint and Finish Matching
Texture matching often goes hand in hand with paint and finish matching. Once the texture is applied and properly blended, you may need to paint or finish the surface to achieve a seamless look. Here are some considerations for paint and finish matching:
Color Matching: Select paint colors that closely match the existing colors in the space. Paint swatches or samples on small areas to confirm the match before applying it to the entire surface.
Finish Matching: Pay attention to the finish of the existing surface, whether it’s matte, satin, or glossy. Choose a paint finish that matches the sheen of the surrounding surfaces to ensure consistency.
Application Technique: Apply paint evenly using the appropriate technique, such as rolling, brushing, or spraying. The application method can affect the final appearance of the painted surface.
Multiple Coats: In some cases, achieving an exact color and finish match may require multiple coats of paint. Be prepared to apply additional coats as needed to achieve the desired result.
Sealing and Protecting: After applying paint or finish, consider sealing the surface to protect it and enhance its durability. Sealers can also contribute to a uniform appearance.
8. Maintenance and Touch-Ups
After completing the texture matching process, it’s essential to maintain the newly textured and finished surfaces. Regular cleaning and maintenance can prolong the life of the textures and keep your home looking its best.
Additionally, be prepared for occasional touch-ups. Over time, even well-matched textures may experience wear and tear or minor damage. Having the necessary materials and skills for touch-ups can help you maintain a seamless look throughout your home.