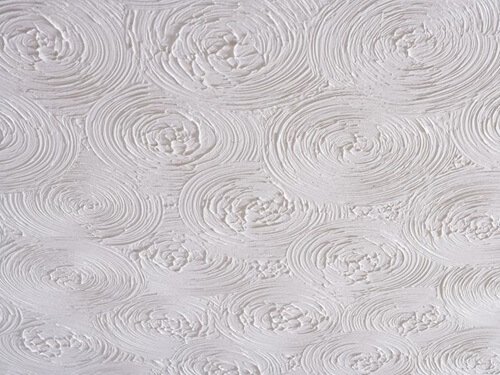
Texture matching in the context of drywall typically refers to the process of replicating the texture of an existing drywall surface when making repairs or modifications. Drywall textures are used to create visual interest and hide imperfections, and there are various types of textures commonly used in residential and commercial construction, such as popcorn, knockdown, orange peel, and more. Here’s a step-by-step process for texture matching drywall:
Tools and Materials Needed:
- Drywall compound (mud)
- Texture material (e.g., premixed texture, texture spray)
- Drywall trowel or knife
- Texture brushes or rollers
- Sandpaper/Sponge
- Painter’s tape
- Plastic sheeting (to protect the surrounding area)
Procedure:
Preparation:
- Clear the area around the damaged or modified drywall of any furniture or objects.
- Use painter’s tape to mask off adjacent surfaces or areas you want to protect from texture overspray.
- Lay down plastic sheeting on the floor to catch any falling texture material.
Repair and Patch:
- If you are matching texture to repair a damaged area, start by repairing and patching the damaged drywall. Fill any holes, cracks, or gaps with drywall compound and allow it to dry completely. Sand the repaired area until it’s smooth and level with the surrounding wall.
Choose the Right Texture:
- Identify the existing texture on the surrounding drywall and choose the appropriate texture material to match it. Different textures require different application techniques and tools.
Prepare the Texture Material:
- If you are using premixed texture, it may need to be thinned with water to achieve the desired consistency. Follow the manufacturer’s instructions.
- For texture spray, make sure the nozzle is set to the desired texture pattern.
Apply Texture:
- Practice your texture application technique on a piece of cardboard or scrap drywall to ensure you can achieve the desired match.
- Apply the texture to the repaired or modified area using the chosen technique (e.g., spraying, rolling, or troweling).
- Try to match the texture pattern and thickness of the surrounding drywall. For example, if you’re matching a knockdown texture, you might use a trowel to apply and then flatten the texture with the trowel.
Blend and Feather:
- To achieve a seamless blend between the new and existing texture, feather the edges of the texture material by gently tapering it into the surrounding wall. This helps to avoid noticeable lines or ridges.
Allow to Dry:
- Allow the newly applied texture to dry according to the manufacturer’s recommendations. This can take several hours or even overnight.
Sand and Touch Up:
- Once the texture is dry, lightly sand it to smooth out any imperfections or high spots.
- If necessary, apply a second coat of texture to ensure a better match.
Painting:
- After achieving the desired texture match and ensuring everything is dry and smooth, you can proceed with painting the repaired area to match the surrounding wall.
Remember that achieving a perfect texture match can be challenging, especially for intricate or heavily textured surfaces. It may take some practice and experimentation to get it just right. If you’re unsure about your ability to match the texture, consider consulting a professional drywall contractor for the best results.